In this guide
- Why Bother?
- Is It Actually Safe to Wash Your Engine With Water?
- Gather Your Tools First
- Choosing the Right Cleaner
- How to Clean an Engine Bay: Step by Step
- Cleaning Without Water
- Using a Pressure Washer
- When Your Engine Bay Needs Cleaning
- Classic and Modified Engines
- Engine Bays in Kuwait's Climate
- Common Mistakes
- Final Thoughts
Cleaning an engine bay is one of the most satisfying jobs in car maintenance. Most drivers avoid it entirely.
They worry water will destroy electronics under the hood. This fear makes sense—it's where all the electrics live.
Actually, it's safe to do. Modern cars come with plastic covers and waterproof connectors designed for this. With basic precautions, you can clean your engine bay in an afternoon and get professional results.
Why Bother?
A clean engine bay does more than look good. It affects how your car runs.
Dirt and grime trap heat. A clean bay lets air flow better, so your engine stays cooler and components last longer (CRC Industries).
Grime builds up on moving parts. Keep the bay clean and friction drops, which means smoother operation and less wear.
There's safety too. Leaves, paper, and oily debris are flammable. They can ignite from hot parts or sparks.
Moisture and dirt corrode electrical connectors over time. Poor connections lead to performance issues.
A clean bay makes maintenance easier. You'll spot oil leaks, coolant leaks, worn belts, and corroded parts before they turn into big problems.
Resale value goes up too. A well-kept engine bay signals that the car was cared for.
Bottom line: a clean engine runs cooler, needs less servicing, and sells better. Simple Green says it plainly: cleaner means more efficient cooling and less wear on cables and pulleys (Simple Green).
Is It Actually Safe to Wash Your Engine With Water?
Yes, if you're sensible about it.
Modern engines are built with this in mind. Manufacturers protect vital parts with plastic trim panels and waterproof plugs (Auto Finesse).
On many modern cars, the critical parts sit behind black plastic covers. There's little left exposed.
The rules are simple: avoid forcing water into sensitive areas. Keep high pressure away from delicate spots.
One rule matters most: temperature. Let the engine cool to the touch before you start.
The temperature shock can warp or crack components. So water isn't the enemy. Uncontrolled water, high pressure in the wrong spots, and a hot engine are the real risks.
Gather Your Tools First

Get everything before you start. It makes the job faster and safer.
Here's what you need:
- An engine-safe degreaser or all-purpose cleaner
- Plastic bags and electrical tape
- Soft brushes and sponges
- A non-metallic scrub brush
- Microfiber towels
- A water hose or pressure washer used carefully
- Protective gloves and goggles
- An air compressor or leaf blower for drying
Safety gear is mandatory. Goggles and gloves protect your eyes and hands from sharp objects and chemicals. Long sleeves and pants are also a good idea.
Choosing the Right Cleaner
The product matters more than the method. The wrong chemical damages the parts you're trying to protect.
Use a non-corrosive cleaner that doesn't harm metal, plastic, or rubber.
What NOT to use
Don't use vinegar. Acetic acid makes metal susceptible to rust.
Never use bleach. It corrodes steel and aluminum and degrades rubber seals.
What about dish soap?
The guides recommend purpose-made cleaners over household products.
Pick a cleaner that's non-corrosive and safe on chrome, aluminum, and stainless steel.
If you use mild soap, treat it as a light helper only. A dedicated engine cleaner breaks down grease and oil in ways ordinary soap can't.
A little car wash solution can help a brush cut through heavy soil before you rinse (Meineke). Think of soap as backup, not the main tool.
Water-based versus petroleum-based
Choose water-based or citrus-based cleaners. Petroleum-based products work fast but degrade rubber hoses and seals.
Pros prefer water and surfactant-based formulas. Many degreasing agents contain petroleum distillates that erode rubber seals and hoses. A water-based product is safer for all the materials in a bay.
What about WD-40?
This question comes up constantly. The answer: no.
None of the professional guides recommend WD-40 for engine bay cleaning. They point to dedicated, non-corrosive degreasers.
The reason is straightforward. An engine bay is coated in heavy, oily deposits. A heavy-duty degreaser breaks those fatty molecules down so they rinse or wipe away.
For general degreasing, use a proper engine degreaser. Keep specialist sprays for what they're made for.
How to Clean an Engine Bay: Step by Step
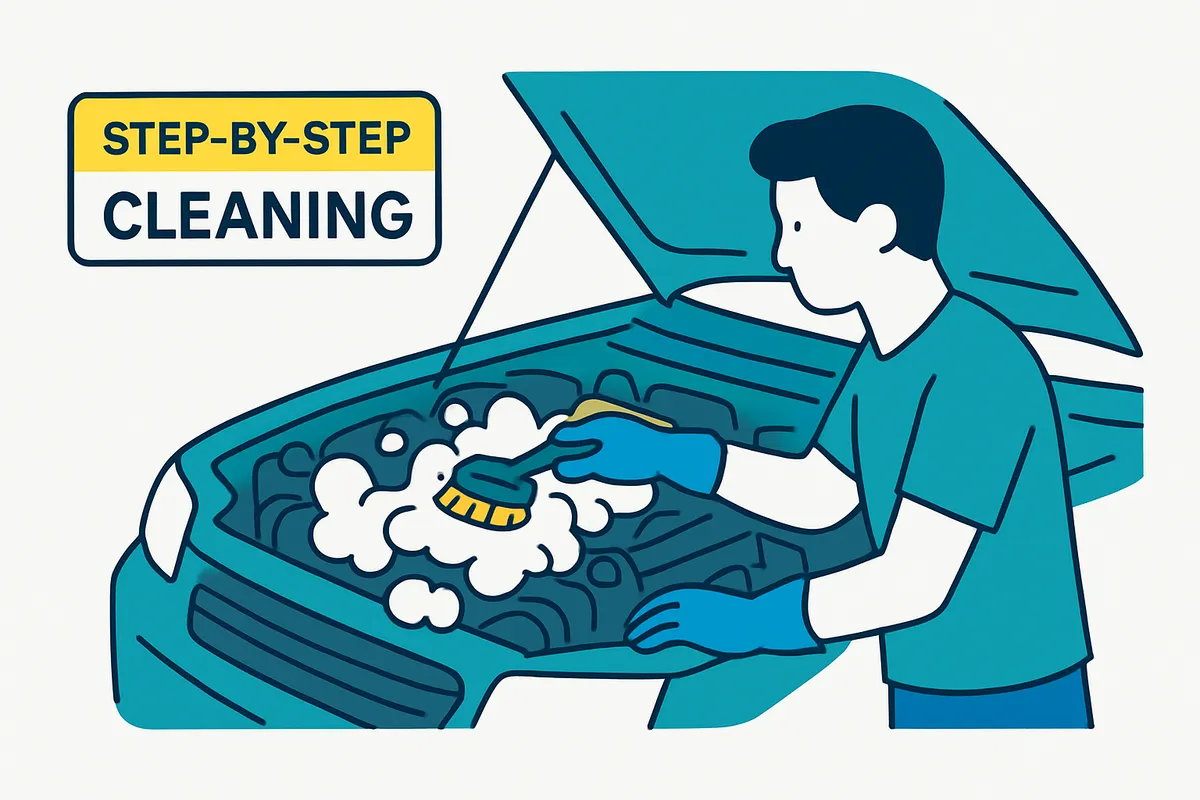
Work through these stages in order.
-
1
Cool the engine
Wait. Let the engine cool completely before you touch anything.
If the car just ran, flip the hood and wait. The engine should be cool to the touch.
Pros use a simple test. If you've just driven, wait at least 20 minutes. You should be able to hold your hand comfortably on the engine.
Put on your safety gear now. Goggles and gloves protect against chemicals and sharp edges.
-
2
Protect sensitive parts
Cover anything you don't want to get wet.
Use plastic bags and electrical tape to seal the battery, alternator, fuse panel, exposed wiring, sensors, and modules.
Cover the air intake and filters.
You don't need to make the bay completely waterproof. Most modern engines are waterproof from the factory, so bags are extra insurance.
Disconnecting the battery is optional.
On a modern car, you may not need to cover much. Watch intakes, alternators, coil packs, and ECUs. Mist lightly over these instead of spraying directly.
While you're in there, check that plugs and cables are seated firmly. A loose connector that pops off unnoticed is exactly what you want to avoid.
-
3
Clear loose debris
Remove the big stuff before any liquid touches anything.
Use a leaf blower or air compressor to blow away loose dirt and debris.
For tight spots, use a soft dry brush to loosen dirt.
Don't forget the edges. Clear leaves and debris from under the windshield wipers. Check underneath for oil leaks while you're there.
-
4
Pre-rinse
A light rinse removes surface dirt so your cleaner works where it needs to.
Start with the underside of the hood, not the engine itself. This way dirty water falls onto parts you haven't cleaned yet, not onto areas you've already finished.
Be careful around soundproofing or carpeted panels under the hood. Don't soak these—they hold water and get heavy, which can cause the hood to drop.
Start at arm's length and work from top to bottom. The goal is to wash away loose contamination, so your cleaner can focus on stuck-on grime.
Quick tip: a warm engine works better with degreaser. Let the car run a few minutes beforehand to loosen grease. Then let it cool to hand-warm before you spray.
-
5
Apply degreaser
Now the cleaner goes to work. Coverage and dwell time matter.
Spray your cleaner generously across the bay, focusing on greasy and dirty areas.
Apply from the bottom up. This keeps the product from dripping on you while you work.
Watch overspray. Degreaser can strip wax from your fenders. Cover them or spray carefully, and rinse them off afterward if they got hit.
Let it sit and work. Allow 10 to 15 minutes for heavy build-up.
Timing depends on cleaner and dirt level. Simple Green suggests 3 to 5 minutes. Meineke suggests three minutes for a clean engine, five for a very dirty one.
Keep it wet. Don't let the solution dry out. A water-based cleaner needs to stay wet to lift and hold the grime.
-
6
Scrub it
Brushing helps the chemistry work. It's not about hard scrubbing.
Use a soft, non-metallic brush on greasy areas.
Scrub thoroughly but gently. You don't want to damage components.
Start at the back of the bay and work forward. That way you're not leaning into freshly cleaned areas and covering yourself in residue.
Brushing does two things at once. It gets the cleaner into every corner. It also moves dirty solution out of the way so fresh product can keep working.
For tight spots down the sides of the engine, use a longer, soft wheel-style brush to reach the lower areas.
-
7
Rinse
Rinsing traps the grime in the solution so it washes away.
Use a hose with a gentle spray or a pressure washer on low. Avoid high pressure so water doesn't penetrate sensitive areas.
With a garden hose, set an adjustable nozzle to a stream. Skip high-pressure nozzles that could damage electrical connections.
A clean method is to rinse from one side and work across, checking your work as you go.
Look for spots you missed. If some areas are still grimy, degrease and scrub them again before the final rinse.
-
8
Dry thoroughly
Drying is what turns a good clean into a great one. Skip it and you get water spots.
Carefully remove the plastic bags and tape. Fold them inward as you take them off so you don't spill dirty water on electrical parts.
Then dry the bay. Use microfiber towels. Use an air compressor or leaf blower to clear water from spots you can't reach.
Don't leave it to air dry. An engine left to air dry gets water spots. Wipe it down with a clean microfiber towel after a few minutes.
Leave the hood open for a while afterward. This lets the bay air dry fully in the hard-to-reach spots.
-
9
Dress and finish
This final step protects your work and gives it that showroom shine.
Use a plastic or rubber conditioner on plastic and rubber components to protect them against dirt and grime.
A water-based trim dressing is ideal. It restores matte plastics along with rubber seals and hoses. You don't even need to dry the bay first.
The more black plastic trim in your bay, the better the result. Spray it on evenly. Let it cure. Later, wipe away any excess that collects in screw holes or crevices with a soft microfiber.
If you disconnected the battery, reconnect it once everything is dry.
Cleaning Without Water
Maybe you live in an apartment with no rinsing access. Maybe you have a classic or heavily modified engine with exposed parts.
A wipe-away method works instead. Spray, scrub, and wipe rather than wet rinse.
Use a dilutable all-purpose cleaner applied to a brush, then agitate and wipe the residue away with microfiber.
The safety advantage is clear. Spraying the product onto the brush instead of directly into the bay lets you avoid sensitive components like exposed electrics.
Work one small area at a time. Keep the surface wet with cleaner. Never let the solution dry. Then wipe away the grime it has lifted.
This hand method is slower than a full wet wash. But for older bays or where water is a concern, it's thorough, controlled, and safe.
Using a Pressure Washer
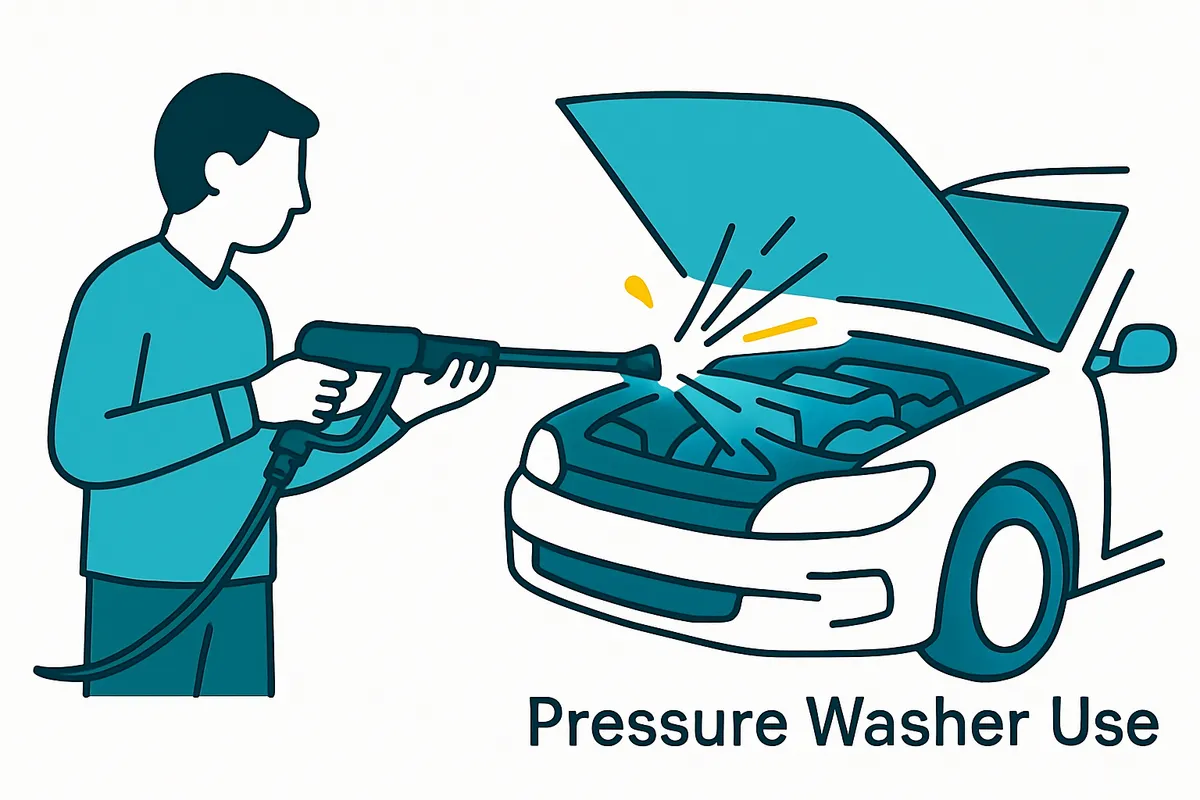
A pressure washer speeds things up. Distance and pressure are everything.
Keep your distance. Start 3 to 5 feet from the surface and move closer only as needed.
Apply the cleaner at low pressure. Use a low-pressure nozzle or foam cannon to lay down the solution. Let it dwell. Then switch to higher pressure only for rinsing.
Even when rinsing, keep your distance to avoid forcing water into sensitive areas.
If you're unsure, turn it down. A gentle spray that protects your electronics beats a powerful blast that pushes water where it shouldn't go.
Prefer not to rinse at home? A self-serve car wash is an option. These facilities capture and treat wash water in a closed system before recycling it.
When Your Engine Bay Needs Cleaning
A few signals make it obvious.
Visible build-up is the clearest one. The more you drive, the more dirt, grime, and oily residue accumulate.
Performance hiccups can hint at neglect. A car that coughs or sputters may need attention. Regular cleaning helps keep things running smoothly.
A dirty bay also hides problems. When it's clean, you spot oil leaks, coolant leaks, worn belts, and corroded parts early.
How often?
You don't need to do this every week. A light, regular rhythm works.
Clean the bay once or twice a year to keep it in shape and spot leaks.
Tie it to work you already do. When you change your oil, that's a perfect time to look over the bay for dirt and build-up.
Classic and Modified Engines
Modern and classic engines are built differently.
Modern bays suit a full wet cleaning method. Classic bays usually need targeted hand cleaning. Modified cars vary depending on which parts are exposed.
For a classic, be targeted. Spray a diluted cleaner onto the brush. Agitate. Wipe away the residue rather than wet rinsing.
Classics also reward finishing. Many have bare metal under the hood that responds well to light metal polish. Rubber hoses and trim can be revived with a dressing.
The rule is caution with exposed parts. A modern bay hides electronics behind covers. An older or modified bay may leave them open, so a hand method keeps you in control.
Engine Bays in Kuwait's Climate
Local conditions shape your approach. Kuwait's heat and dust call for adjustments.
Heat affects cooling time. On a hot day, an engine stays warm long after you park. Give it extra time to cool. Use the hand test before you start.
Fine dust and sand get into every corner of a bay quickly. A dry debris blow-out before you add liquid is especially worth doing in dusty conditions.
Hard water is another local factor. Mineral-rich water leaves spots as it dries. Prompt, thorough drying with a microfiber towel matters even more than usual.
Given the dust load, the lighter end of the cleaning schedule might not be frequent enough. Inspect the bay more often. Do a quick wipe-down between deeper cleans. This keeps grime from baking on.
None of this changes the core method. It simply means being extra patient with cooling, extra careful with debris, and extra careful with drying.
Common Mistakes
Avoid these and you're most of the way there.
Cleaning a hot engine. Wait until it's cool to the touch. Never cool it fast with water.
Blasting with high pressure. Keep pressure low and your distance sensible. Don't force water into electronics.
Using the wrong chemicals. Skip vinegar and bleach. Use a non-corrosive, water-based cleaner.
Letting the cleaner dry on the surface. A water-based product needs to stay wet to lift grime.
Leaving the bay to air dry. This is how you get water spots. Wipe it down instead.
Forgetting overspray. Degreaser strips wax from fenders. Protect them or rinse them afterward.
Frequently asked questions
Is it a good idea to clean the engine bay?
Yes. A clean bay improves heat dissipation, reduces the risk of debris and grease igniting, and makes leaks and worn parts easier to spot.
Is it safe to spray your engine with water?
Generally yes, with care. Modern engines have plastic covers and waterproof plugs that make wet cleaning safe. Avoid high pressure on sensitive spots and keep the engine cool.
Can I use dish soap to clean my engine?
The guides recommend purpose-made, non-corrosive cleaners over household soap. A little car wash solution can help on heavy soil, but a dedicated engine cleaner is built to break down grease and grime properly.
Is WD-40 good for cleaning an engine bay?
Professional cleaning guides recommend dedicated, non-corrosive degreasers instead. A heavy-duty degreaser breaks down the oily deposits found in a bay.
What do mechanics use?
Dedicated degreasers and all-purpose cleaners that break down oily deposits and can be rinsed or wiped away. Water-based or citrus-based formulas are preferred because petroleum-based ones degrade rubber.
How long does it take?
For most cars, under an hour.
Do I need to cover the engine if it's modern?
Often very little needs covering. Stay cautious around intakes, alternators, coil packs, and ECUs. Mist lightly rather than spray directly. When unsure, a plastic bag and tape add cheap peace of mind.
Final Thoughts
The bottom line
A clean engine bay is a small project with a big payoff. It runs cooler. It's easier to service. It holds its resale value.
The steps are simple. Cool the engine. Protect sensitive parts. Clear debris. Degrease and scrub. Rinse gently. Dry and dress.
Use a non-corrosive, water-based cleaner. Keep pressure low. Never let the product dry on the surface. Do that and the job is safe and satisfying.
If you'd rather have a professional handle it, or if you don't have space to rinse safely at home, Posefore Wash & Polish offers a Mobile Car Wash service that comes to your location across Kuwait. It's an easy way to keep your car spotless inside and out.