In this guide
- Why Washing Your Motorcycle Actually Matters
- Before You Start: Get the Bike Ready
- What to Use to Clean a Motorcycle
- How to Clean Motorcycle Wheels
- How to Clean Motorcycle Brake Discs and Rotors
- How to Rinse and Dry Without Water Spots
- How to Clean and Lube the Motorcycle Chain
- How to Clean Chrome, Metal, and Aluminum Parts
- How to Polish and Protect Your Motorcycle
- Where NOT to Spray on a Motorcycle
- How to Clean a Motorcycle Helmet
- How to Clean Leather and Textile Riding Gear
- How to Clean Rust Out of a Motorcycle Gas Tank
- Cleaning the Air Filter, Carburetor, and Stickers
- Washing Your Motorcycle in Kuwait's Climate
- Final Checks and Everyday Care
Learning how to wash a motorcycle properly is one of the simplest ways to protect your bike. A clean machine looks sharp. It runs better and lasts longer.
This guide walks you through the whole process—from letting the engine cool to the final coat of wax.
You'll also learn how to clean the parts most people forget: the helmet, the chain, the gas tank, the chrome.
Everything here is safe for the paint, the electrics, and the moving parts. Let's get started.
Why Washing Your Motorcycle Actually Matters
Your bike gets dirty every time you ride it. That's unavoidable.
But dirt is more than cosmetic. Built-up grime can damage your bike's parts and shorten their life (Halfords).
Regular cleaning protects the surface finishes. It also gives you a chance to spot damage, wear, and any oil or brake fluid leaks (Honda).
So a wash is really two jobs in one: you clean the bike, and you catch small problems before they become big ones.
How Often Should You Wash a Motorcycle?
There's no single rule. It depends on where you ride and how often.
A common guideline is every two weeks (Damon). After harsh conditions—heavy rain, mud, or dust—a thorough clean becomes essential to prevent long-term damage (Chemical Guys).
A quick wipe-down after each ride helps too. Hitting the tank, wheels, and headlights keeps dirt from building up and saves you from harder deep-cleaning sessions later.
Before You Start: Get the Bike Ready
Most damage during washing happens because people rush the setup. Take a few minutes to prepare properly.
Let the Engine and Exhaust Cool Down
Never wash a bike that's still hot from a ride.
Give the engine enough time to cool first. The engine and metal parts like the carburetor absorb a lot of heat on the road, and you can burn yourself.
Spraying cold water onto a hot engine can crack metal components from thermal shock. If the machine is still warm, wait until the engine and exhaust system cool off. A short pause protects your bike and your hands.
Wash in the Shade, Not the Sun
Sun and soap don't mix.
Direct sunlight dries soap and water faster than you can rinse it away. That leaves marks and streaks that are hard to remove later.
Make sure the bike's surface is cool and shaded. Hot surfaces make water and soap evaporate too quickly.
A garage, a tree, or a camping canopy all work well.
Protect the Exhaust and Electrics
Water in the wrong place causes trouble.
Plug the exhaust ports with a rag, a rubber plug, or even a plastic glove to keep water out.
When you rinse, keep water away from the muffler outlets and electrical parts. We'll cover the full "where not to spray" list further down.
What to Use to Clean a Motorcycle
The right supplies make the job easier and safer. Here's what the pros use.
- Two buckets with dirt traps. One for soapy water, one for clean rinse water.
- A motorcycle-specific cleaner. Choose one that's safe for all the surfaces on your bike.
- Microfiber cloths. They're soft, reduce the chance of scratches, and absorb water well, so drying is quicker.
- A wash mitt. Soft materials help prevent scratching the surfaces.
- Soft-bristle brushes in a few sizes for intricate areas.
- A degreaser for engine and chain grime.
- A chain cleaner and lubricant for after the wash.
- A metal or chrome polish to restore shine and remove oxidation.
- A garden hose with an adjustable nozzle for gentle rinsing.
If you have no running water or you're conscious of water use, waterless wash products work too.
What NOT to Use
This matters as much as what you do use.
Avoid cleaning products not designed for motorcycles or cars. They may contain harsh detergents or solvents that damage metal, paint, and plastic.
No car shampoo, no household detergent, no body wash. Products not made for bikes can carry chemicals that harm the paint and components.
About dish soap: it's a household detergent, not a dedicated motorcycle shampoo. Stick with a motorcycle-specific product.
How to Wash a Motorcycle Step by Step
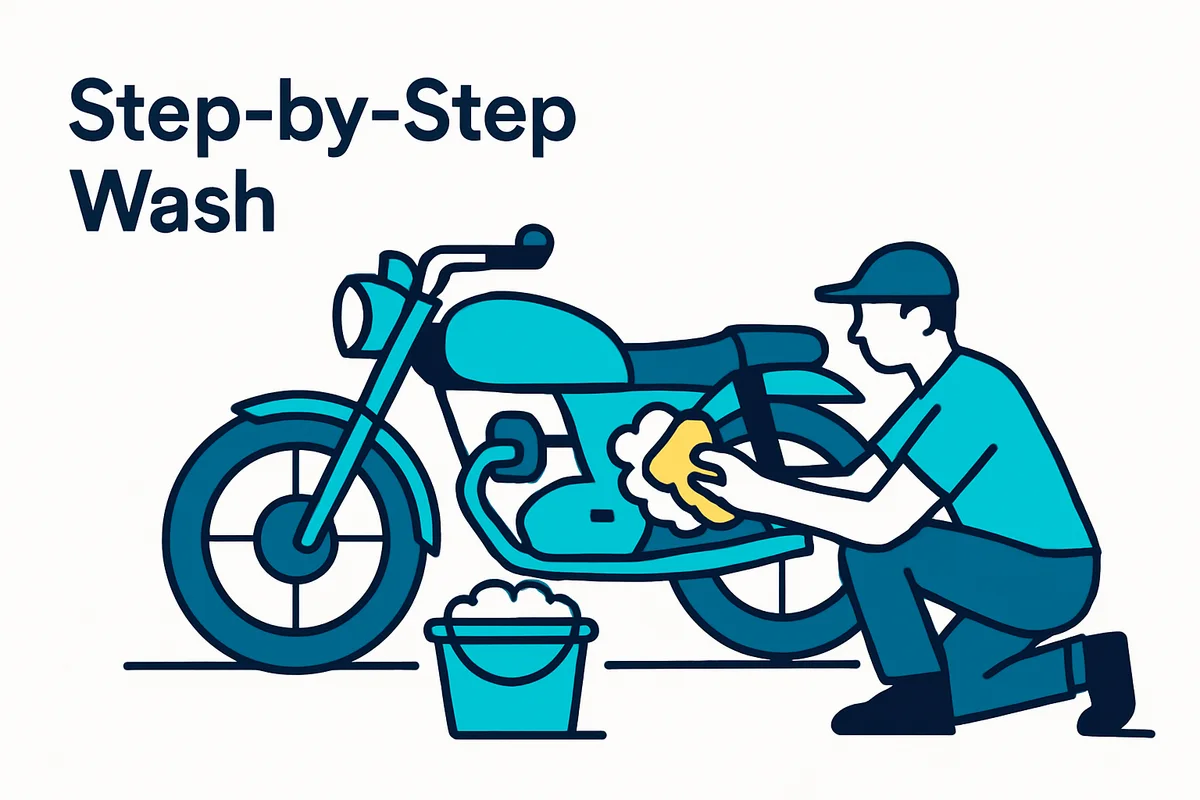
Now the main event. Work through these steps in order.
-
1
Rinse and Pre-Clean
Start with a gentle rinse before you touch the bike with a mitt.
This first rinse washes away loose dirt, dust, and debris. Skip it, and you drag grit across your paint and chrome, creating scratches and swirls.
Focus on the dirt magnets: the wheels, fenders, and exhaust collect the most grime.
A pre-clean gel helps on a very dirty bike. Spray it over the bike, leave it a few minutes to soak the engine and crevices, then brush and rinse.
-
2
Wash With the Two-Bucket Method
This is the single most important technique for a scratch-free finish.
Fill one bucket with water and motorcycle shampoo. Fill the second with clean water for rinsing your mitt.
Here's why: as you clean, grime collects on your cloth. Rinsing it in the same bucket puts that dirt straight back on the bike. A separate clean bucket keeps the grit out of your soapy water.
Wash from the top down. Use straight, gentle strokes so dirt flows downward and doesn't re-soil the areas you already cleaned.
For tight spots like around the engine and between the spokes, switch to a soft brush.
-
3
Handle Plastic and Painted Parts Gently
Fairings, panels, and painted surfaces need a soft touch.
Clean plastic parts with a cloth or sponge dampened in mild detergent and water. Rub the soiled area and rinse frequently with fresh water.
Keep brake fluid and chemical solvents away from these surfaces—they damage plastic and paint.
Matte paint is a special case. Use only car wash soap and water with a microfibre cloth. Even a little dirt on a matte finish leaves a scuff mark.
-
4
Deal With Bugs the Right Way
Dead bugs are stubborn. Scrubbing them off risks the paint.
Don't attack them. Too much scrubbing can damage the paint job.
Loosen them first instead. Warm water or a dedicated bug remover softens them so they wipe away far more easily.
Very filthy parts and dead insects respond well to soaking. Let them sit in a soap solution, then rinse.
How to Clean Motorcycle Wheels
Wheels take the worst of the road, so they get their own step.
Start with a degreaser or wheel-specific cleaner that cuts brake dust and grime. Spray it on and let it sit a few minutes.
Avoid harsh cleaners that could damage the rims and spokes.
Then take a soft-bristle or detail brush and scrub. Spoked wheels need a brush that fits between the spokes.
Use detail brushes for the hub, brake discs, and spokes where grime hides.
Finish by rinsing thoroughly so no cleaner or debris is left behind.
How to Clean Motorcycle Brake Discs and Rotors
Brakes need care, but not the same care as the rest of the bike.
Water and soap are fine on the chain and brakes. Don't get scrub-happy though. Aggressive scrubbing wipes away coatings and lubes needed for smooth riding. Just rinse them and re-lubricate the chain afterward.
Brake discs and pads can build up surface rust and dirt. A dedicated brake cleaner breaks down that grime. Wipe away the excess fluid.
One safety note: braking can be less responsive right after cleaning. Test the brakes before you ride and pump them several times to restore normal performance.
How to Rinse and Dry Without Water Spots
A careful rinse and dry is what separates a good wash from a great one.
The Final Rinse
Grab a low-pressure hose for the final rinse. High-pressure water damages sensitive parts like seals, bearings, and electrical components.
Rinse from the top down. Pay attention to hidden spots under the fenders, around the engine, and between the wheels where soap hides.
Rinse thoroughly. Strong detergent residue left on the bike can corrode alloy parts.
Drying the Bike
Don't let it air dry. That invites water spots and rust in hidden nooks.
Use a microfiber towel, a chamois, or an air blower.
An air blower is handy for tricky spots. It clears water from cracks, seams, and around engine parts without touching the surface, so you get fewer scratches.
Dry from the top down and watch for pooling spots. Around mirrors, in cracks, under the seat, and around engine components, standing water leads to spots or rust.
After drying, start the engine and let it run for a few minutes.
One quick tip on headlights: the inside lens may look clouded after washing. Switch the headlight to high beam and run the engine—this clears the condensation as it warms.
How to Clean and Lube the Motorcycle Chain
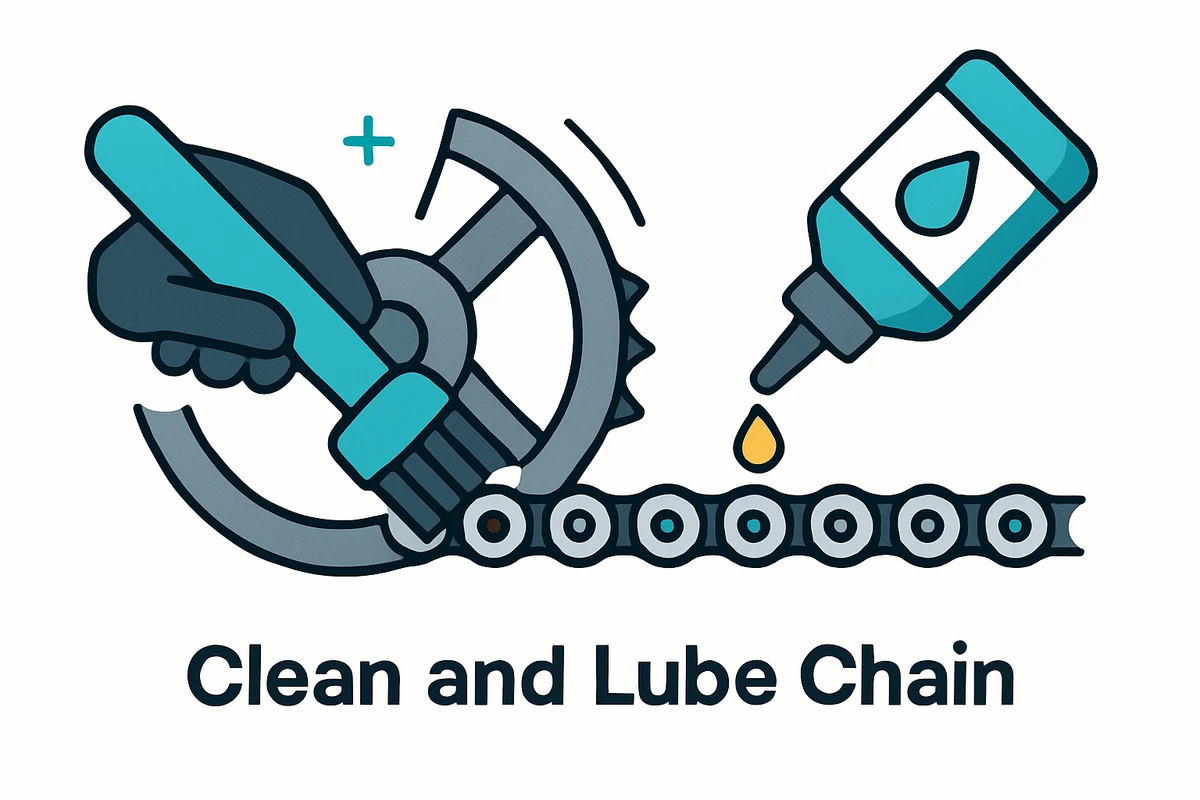
The chain is the one place where you want grease to stay. Washing strips some of it away. Re-lubing is not optional.
First, clean off the grime. Use a motorcycle-specific chain cleaner to remove dirt and any leftover degreaser. Take your time getting into every link.
A dedicated chain brush helps. Chain grease holds dirt stubbornly.
Watch for rust. Flash rusting happens when wet metal dries naturally. A chain cleaner with a rust-inhibiting formula prevents it.
Once the chain is clean and fully dry, apply a motorcycle-specific lubricant. Spread it evenly. Give extra attention to the rollers and links. Let it soak in before you ride.
Re-lube the entire chain after you've washed and dried the bike. Honda advises lubricating the drive chain immediately after washing and drying.
How to Clean Chrome, Metal, and Aluminum Parts
Bright metal is what makes a bike shine. It needs its own products.
For chrome and metal surfaces, use a metal polish made to clean and restore shine while preventing oxidation. Work in small sections with a microfiber applicator pad, let it haze, then buff it off with a clean microfiber towel.
Aluminum parts can corrode from contact with dirt, mud, or road salt. Clean the wheels after riding through any of these with a wet sponge and mild detergent.
Be gentle with aluminum. Avoid stiff brushes, steel wool, or abrasive cleaners.
For the engine and other metal parts, a motorcycle degreaser lifts built-up grime. Scrub carefully with a brush, then hose off.
Bare metal and non-painted aluminum can be protected further. Chromium polish cleans and protects bare metal.
The exhaust pipe is steel and can get stained by oil or mud. Remove heat stains with a liquid abrasive.
How to Polish and Protect Your Motorcycle
Cleaning is only half the job. Protection keeps the finish looking new.
Once the bike is dry, apply a motorcycle-specific wax or polish. Look for one with UV protection to keep the color vibrant and shield against sun damage, dust, and moisture.
Apply it with a microfiber cloth in smooth, even strokes. Let it sit for around 15 minutes, then buff it off with a fresh microfiber towel.
Only use a non-abrasive polish or wax made specifically for motorcycles or automobiles. Read the instructions first.
Wax is worth doing year-round. It adds a fresh look and extra protection to the paint.
One caution during polishing: keep protectant off the tire treads and the hand and foot controls. A slippery grip or footpeg is dangerous.
After polishing, protect against future corrosion. Multi-purpose protectant sprays designed for motorcycles guard parts and can also lubricate stiff components.
Where NOT to Spray on a Motorcycle
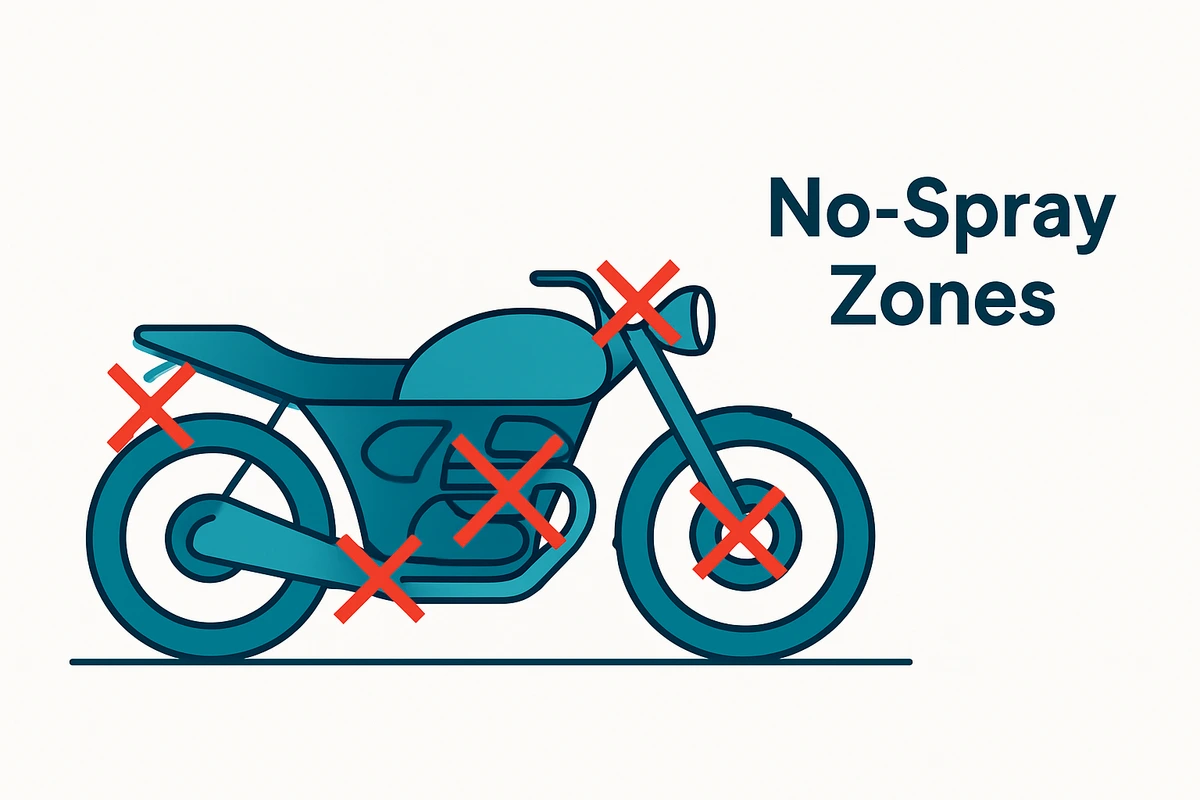
This is the list that saves you from expensive mistakes. Keep water and high pressure away from these areas.
- Muffler outlets and electrical parts. Don't squirt water at them.
- Bearings. Water here causes humidity that can lead to corrosion.
- Seals, bearings, and electronics. High-pressure water can wreck these delicate parts.
- The chain and brakes. Don't scrub them. You'll strip essential lubes and coatings.
Should You Use a Pressure Washer or a Car Wash?
This is one of the most common questions. The safe answer is no.
Avoid the pressure washer. Getting too close damages your bike's components. A cloth does a more thorough job anyway.
Honda is direct about it too: don't use high-pressure water sprays like the ones at coin-operated car washes. High-pressure water or air can damage parts of your motorcycle.
The same logic applies to automatic car washes. Taking your motorcycle to a car wash can have the same effect as a pressure washer, only worse.
Stick to a garden hose you can adjust the pressure on. If you'd rather not risk it at all, a professional mobile wash that knows bikes is safer.
How to Clean a Motorcycle Helmet
Your helmet is your most important piece of safety gear. For many riders, it's also the most expensive (RevZilla). It deserves the same care as the bike.
The good news: it doesn't take much time, effort, or special supplies.
What You Need
Gather a few simple things:
- Warm water to gently loosen dirt and dead bugs without harsh scrubbing.
- Microfiber towels, which are less likely to scratch as long as they're clean.
- Baby shampoo, a mild agent well suited to the interior lining that soaks up sweat and hair oils.
- A toothbrush for vents and crevices.
- Compressed air if you have it—never from an aerosol can, since that can erode the EPS liner and degrade its protective ability.
Clean the Interior Lining
The inside usually needs the most attention because of sweat and hair oils.
First remove any electronics like Bluetooth units, speakers, and batteries. Then remove the interior liner and cheek pads. Most attach with snaps, though some use hook-and-loop or magnets. Check your owner's manual if in doubt.
Add a small amount of baby shampoo to warm water. Dunk the liner and pads and gently massage each piece to rinse out the gunk. Set them on a towel and let them air dry, preferably overnight.
Clean the Exterior
Before you start on the inside, prep the outside.
Soak a microfiber towel in warm water and drape it over the helmet. The moisture loosens dried bug guts and caked-on dirt without any scrubbing.
Once it's softened, use a different clean, wet microfiber cloth to wipe away the leftover dirt. Stick to warm water only—this avoids solvents or cleaning solutions that could damage the helmet. A toothbrush handles the vents and crevices.
If a dead insect is wedged deep in a vent channel, a quick blast from an air compressor (not an aerosol can) gets the air flowing again.
Clean the Visor and Faceshield
The faceshield needs the most careful hands of all.
Scratches are genuinely dangerous while riding. Many modern faceshields have a protective coating that damages easily.
It's easiest to clean the shield by removing it from the helmet. Use water only and gently wipe away dirt with a microfiber cloth.
Internal drop-down sun shields usually don't get dirty. Clean them with water and a cloth. Removing them is often more trouble than it's worth.
If you have a Pinlock insert, remove it for cleaning. Be especially careful—it scratches easily and its gasket is integral to the system.
Once the liner and pads are fully dry, reassemble everything and you're ready to ride.
A note on cleaners for the helmet: stick with warm water and mild baby shampoo. Water-only cleaning of the exterior and shield avoids solvents that could harm the shell or coating. If household glass cleaners or alcohol tempt you, treat that softer advice as the safer default and keep harsh chemicals away from the shield.
How to Clean Leather and Textile Riding Gear
Your jacket and seat see as much dirt as the bike. Handle leather gently.
For leather seats and surfaces, use a leather cleaner made for delicate surfaces. Dab it onto a microfiber cloth and gently wipe to lift dirt and grime. Avoid heavy scrubbing that could damage the leather.
After cleaning, apply a leather conditioner to keep the material moisturized and shielded from sun and weather. Test it on a small hidden spot first to be sure it works.
The same clean-then-condition approach applies to a leather jacket. Keep it gentle, condition after cleaning, and always spot-test.
For textile gear, follow the garment's care label. When in doubt, mild soap and a gentle hand protect the fabric and any waterproof membrane better than aggressive washing.
How to Clean Rust Out of a Motorcycle Gas Tank
Rust inside the tank is common on bikes that have been sitting. It's challenging to clean but not impossible (Full Throttle).
Abrasive Method
Empty the tank first. Drop in some gravel, nuts, and bolts. Add a liquid such as soapy water or, preferably, vinegar.
Seal the tank and the holes. Shake it thoroughly on all sides so the abrasives reach every part and break down the rust. Pour out the liquid, rinse well with clean water, and dry it completely before refitting.
Chemical Method With Vinegar
Vinegar is the go-to home chemical. It's not as heavy-duty as commercial products though.
For a safer approach, use vinegar mixed with baking soda. Fill the tank with the mixture and let it sit until it bubbles and the color changes as rust breaks off. Pour it out and rinse thoroughly before drying.
Stronger options like commercial rust removers exist. If you use them, follow the label instructions exactly.
Sealing and Prevention
Sometimes stubborn rust particles remain. A gas tank sealer can finish the job, applied per the brand's instructions.
Prevention beats repair every time. Keep the tank filled to leave little room for condensation. Start the engine regularly if you don't ride often. Add a fuel stabilizer to stop the fuel from separating and to limit condensation that encourages rust.
Safety First
Fuel and these chemicals are hazardous:
- Wear eye protection and a face mask.
- Work in an open, well-ventilated area to avoid concentrated fumes.
- Don't mix products except per the manufacturer directions—reactions can occur.
- Keep heat and power sources away, and store fuel properly while you work.
- With acids stronger than vinegar, keep a hose nearby to dilute any spillage. Plug all the holes to avoid leaks.
If handling potentially dangerous chemicals makes you uneasy, a rust-removal expert is a sensible alternative.
Cleaning the Air Filter, Carburetor, and Stickers
A few extra jobs come up often and call for care rather than a quick fix.
The air filter and carburetor are best approached with your specific bike's service manual open. These are internal components. The manufacturer's stated procedure and intervals matter more than any generic routine. If you're unsure, lean on a professional service.
For old stickers and adhesive residue, patience wins. Gentle heat softens the adhesive so the sticker lifts without gouging the paint. A purpose-made adhesive remover clears the leftover gum. The same "loosen, don't scrub" principle that works on baked-on bugs applies here.
Washing Your Motorcycle in Kuwait's Climate
Kuwait's heat, sun, and dust change how you should approach a wash. The techniques above still apply, but a few points matter more here.
Timing and shade matter. Under a strong sun, soap and water dry almost instantly. Washing in the shade on a cool surface is the reliable way to avoid streaks and spots. Early morning or evening, out of direct sun, is your friend.
Let the engine cool fully first. After a hot ride in high ambient temperatures, the thermal-shock risk of cold water on hot metal is very real. Give it plenty of time.
Fine dust is the local challenge. That first gentle rinse to float grit away before you touch the paint is what prevents scratches. Never skip it in a dusty climate.
Dry thoroughly to beat water spots. In dry heat, standing droplets evaporate and leave marks quickly. A full towel-down and attention to pooling spots pays off.
Finally, protect the finish. A UV-rich wax helps defend the paint against strong, constant sun—and washing off dust and grime regularly stops it corroding parts over time.
Final Checks and Everyday Care
Finish every wash with a quick inspection. Look over the bike to spot any missed areas. Check for mechanical issues while you're up close.
Don't rush the whole process. Taking your time avoids paint damage and makes sure you actually remove harmful deposits rather than just moving them around.
Between full washes, keep up the small habits. A spot clean after each ride, a two-week wash schedule, a cover or garage to shield the bike, and regular chain care all keep your motorcycle looking and running its best.
The bottom line
Done right, a wash is more than cleaning. It's maintenance, inspection, and protection rolled into one relaxing job.
If you'd rather leave it to someone who knows bikes, Posefore Wash & Polish offers a mobile Specialty Vehicle Wash for motorcycles across Kuwait. We use bike-safe methods and products so your machine gets a careful, thorough clean without the risk of a high-pressure car wash.